
Platform Features: Highlighting, Filtering, Sorting, and Presets Saving
This guide walks through four core features that help you customize how data is displayed in your dashboard: highlighting cells based on value ranges, filtering campaigns and other dimensions, advanced sorting, and saving custom views as presets for quick access.
1. Highlighting
Highlighting lets you color-code cells in any numeric column based on value ranges, so you can instantly spot which campaigns, products, or sources are performing well, average, or underperforming.
How to set it up
- Open the Highlights menu and click Add highlights.
- Select the column you want to highlight (for example, Subscribers).
- Click Apply.
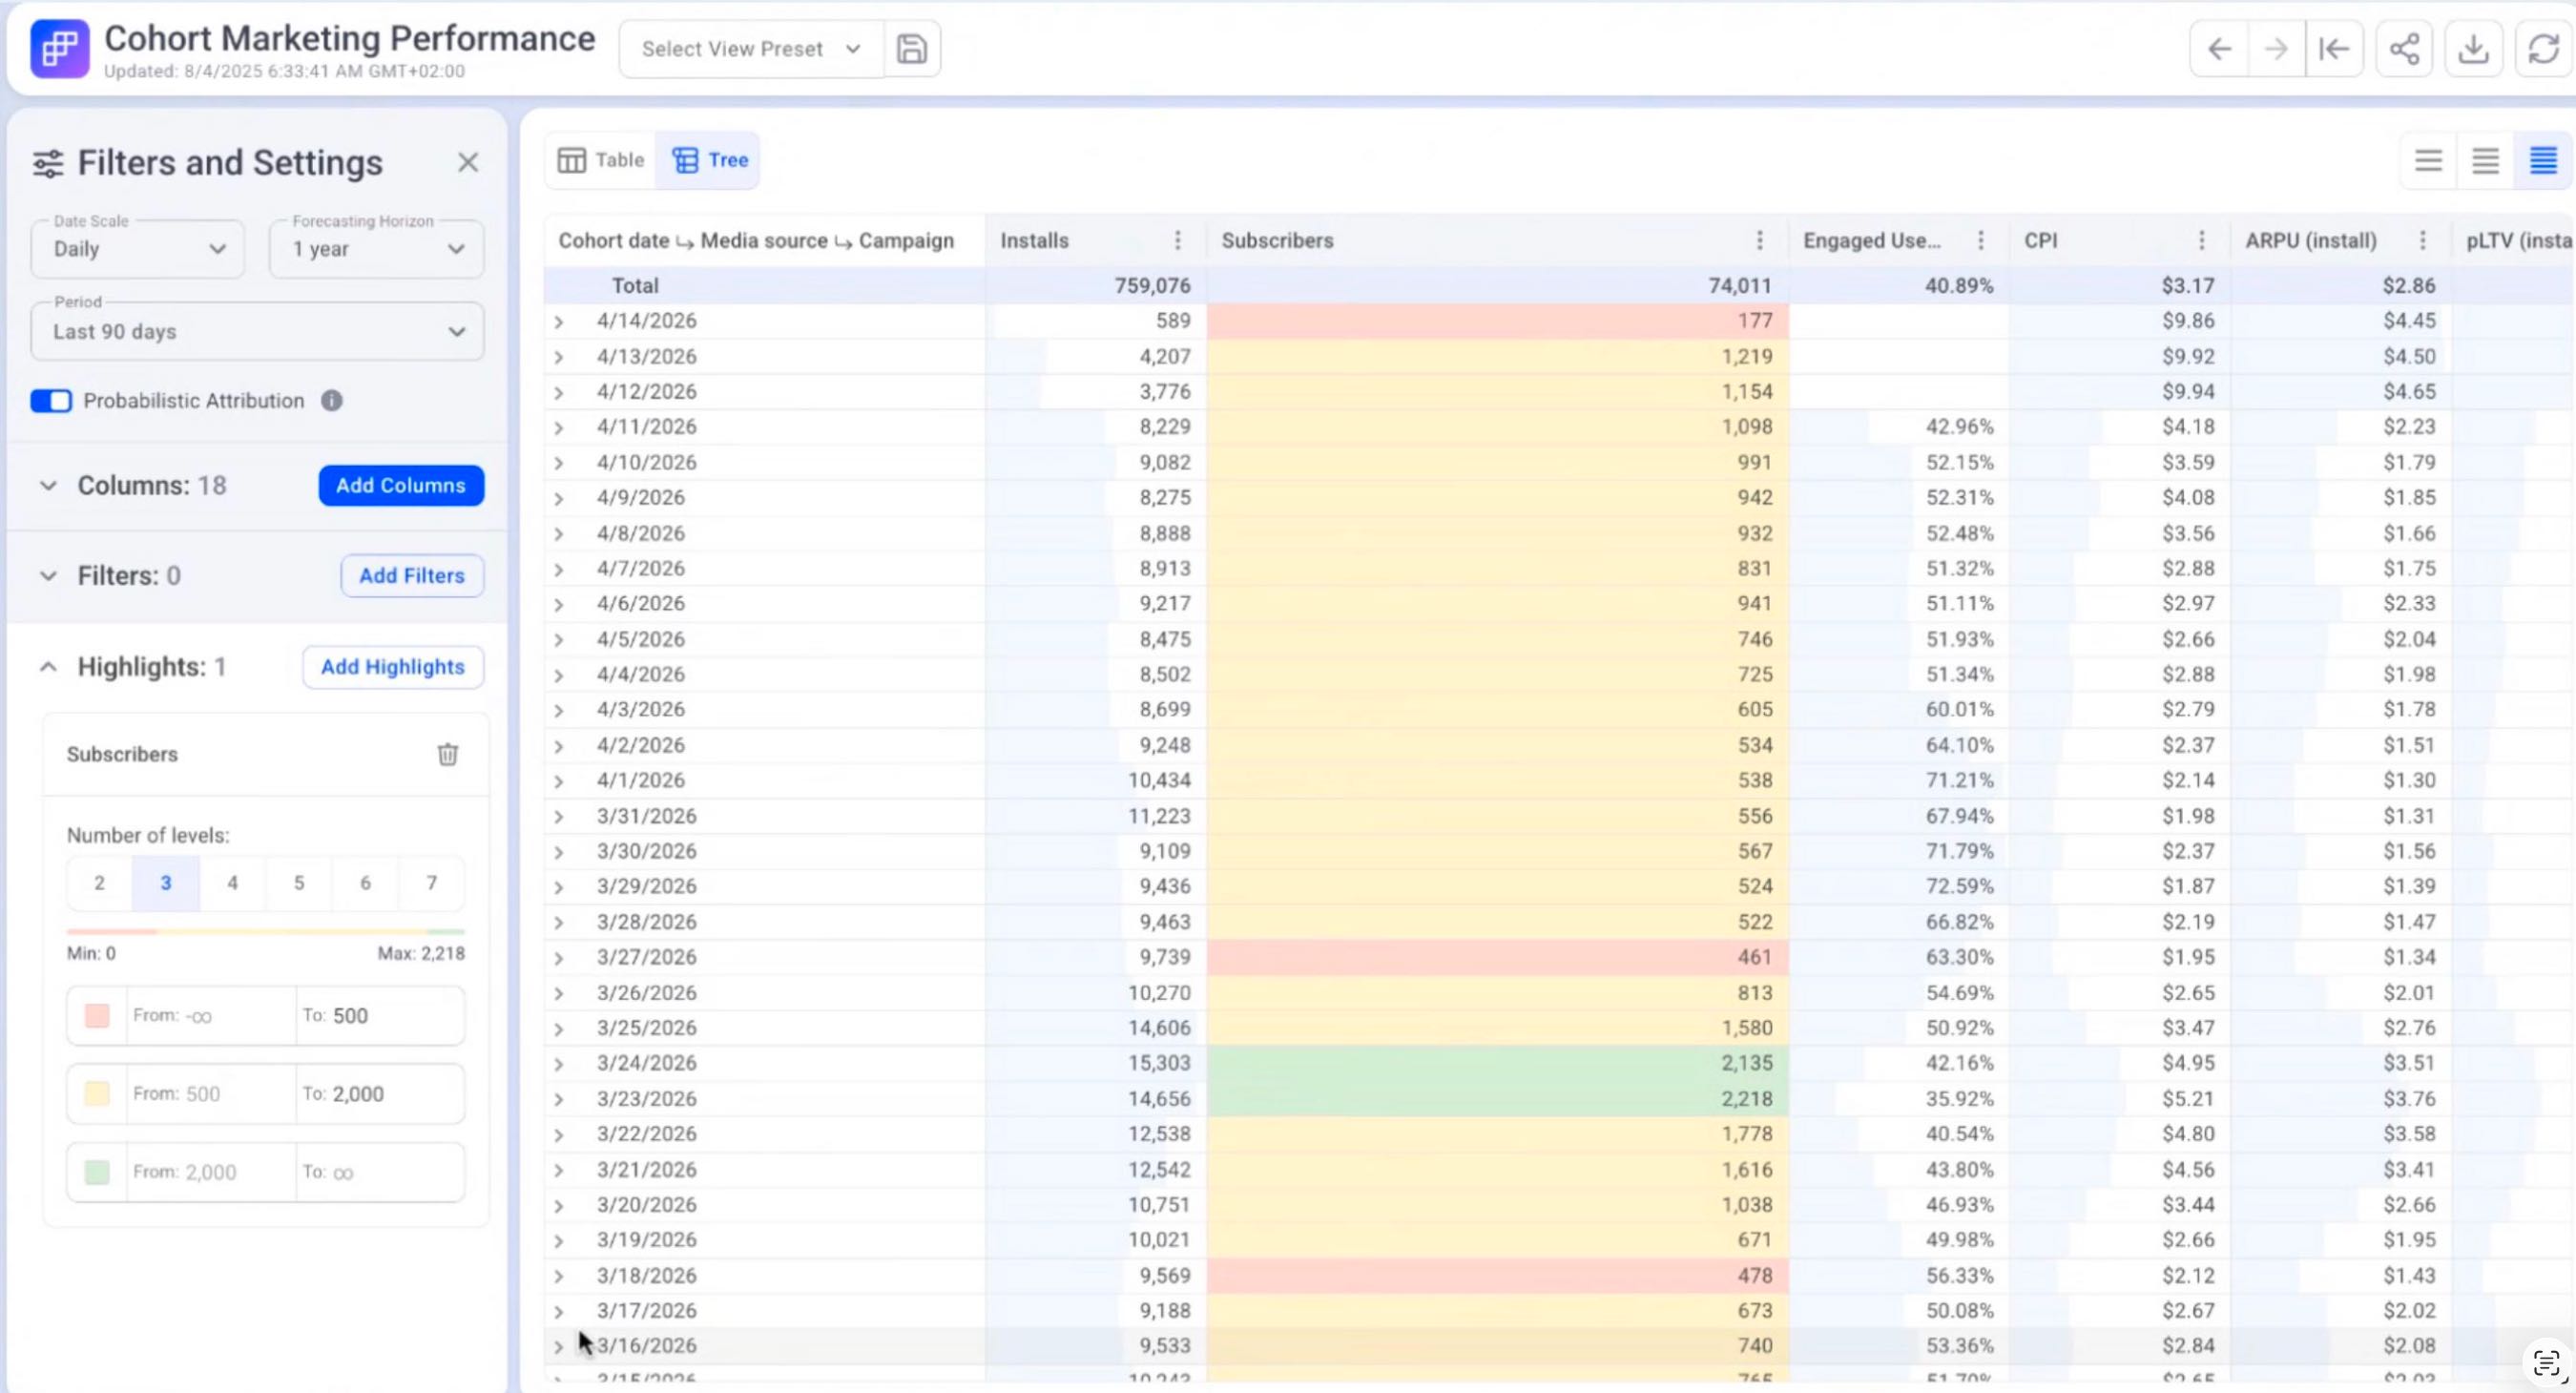
Defining your levels
By default, the platform applies its standard color scheme. To customize the thresholds, define your own levels. For example, on the Subscribers column you might set:
- Red: 0 to 500
- Yellow: 500 to 2000
- Green: 2000 and above
Once applied, every value in the column is colored according to which range it falls into. A row showing 177 subscribers would be highlighted red, while 2500 would show green.
2. Filtering
Filters let you narrow down the data view to only the campaigns, sources, or other dimensions you care about. Filters support partial matching, so you don't need to type the full campaign name to find it.
How to filter campaigns
Use case: you want to see only campaigns whose names contain a specific number, country code, or keyword (for example, all campaigns with "50" in the name).
- Click Filters → Add filter.
- Search for Campaign and click Clear all to start fresh.
- Choose the match type from the dropdown. The available options are:
- Include — exact match for the values you select
- Exclude — everything except the values you select
- Contains — partial match (any campaign name containing the string)
- Does not contain — excludes anything matching the string
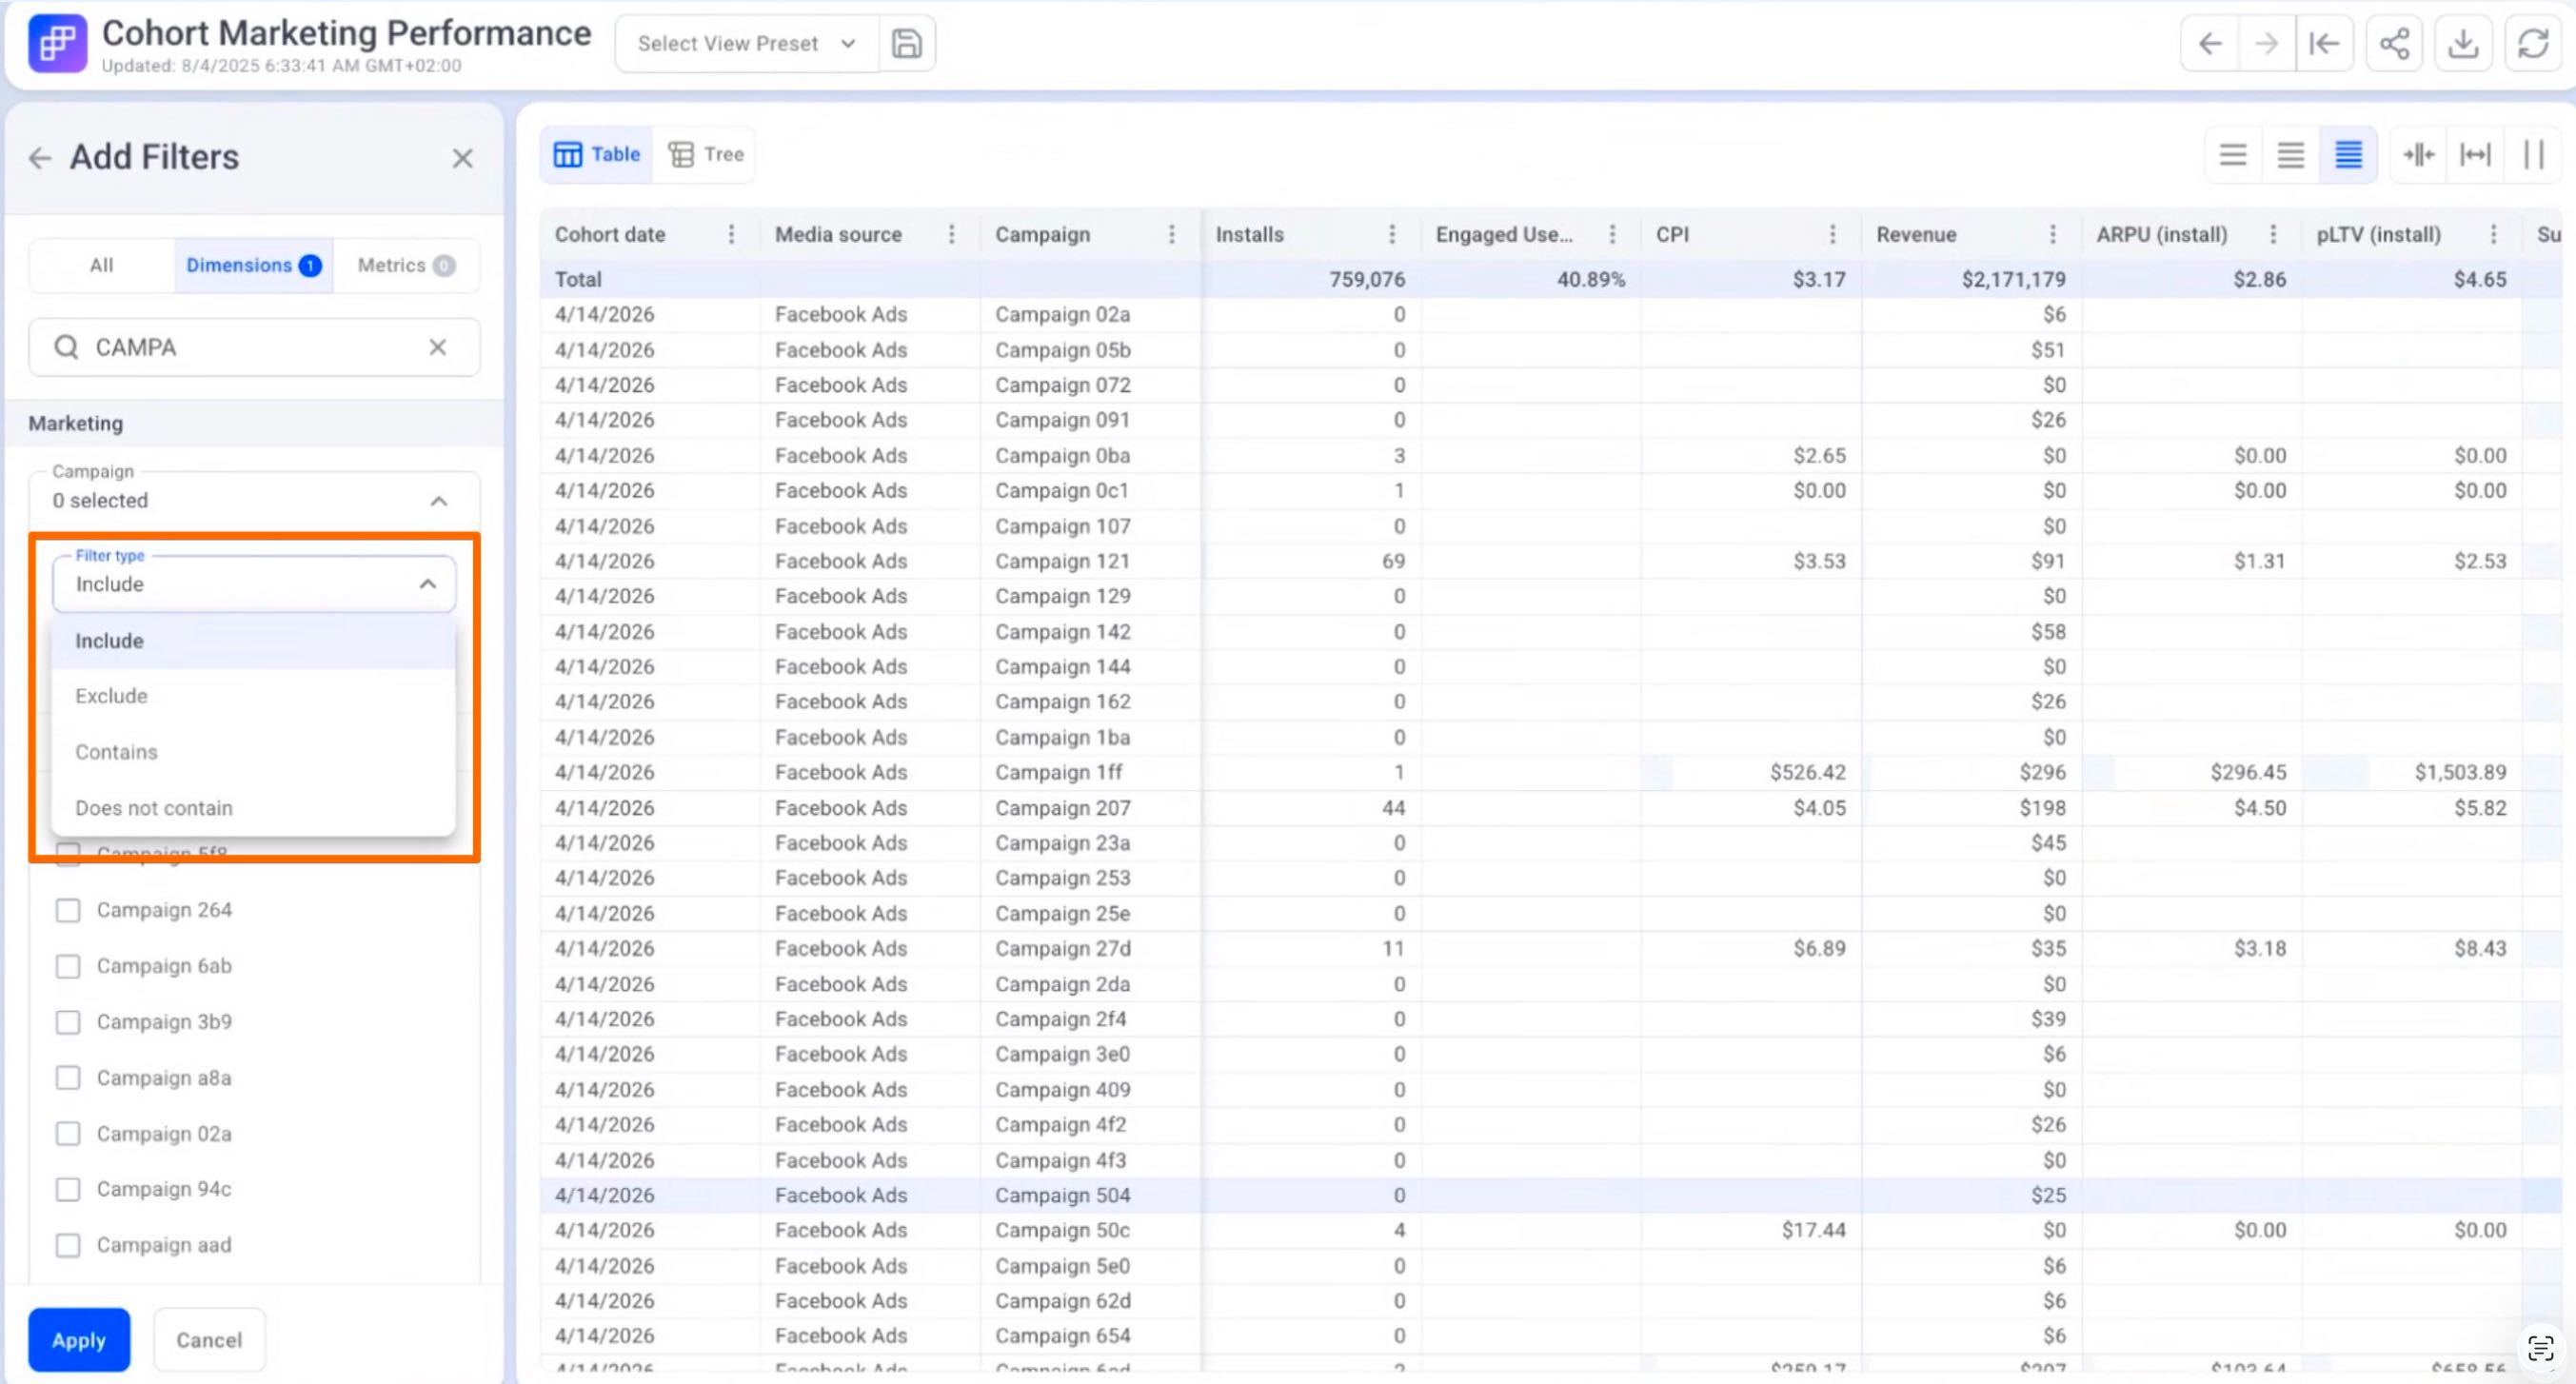
- Select Contains, type your string (for example,
50), and the platform shows you how many campaign names match (e.g. "17 options matched"). - Click Apply.
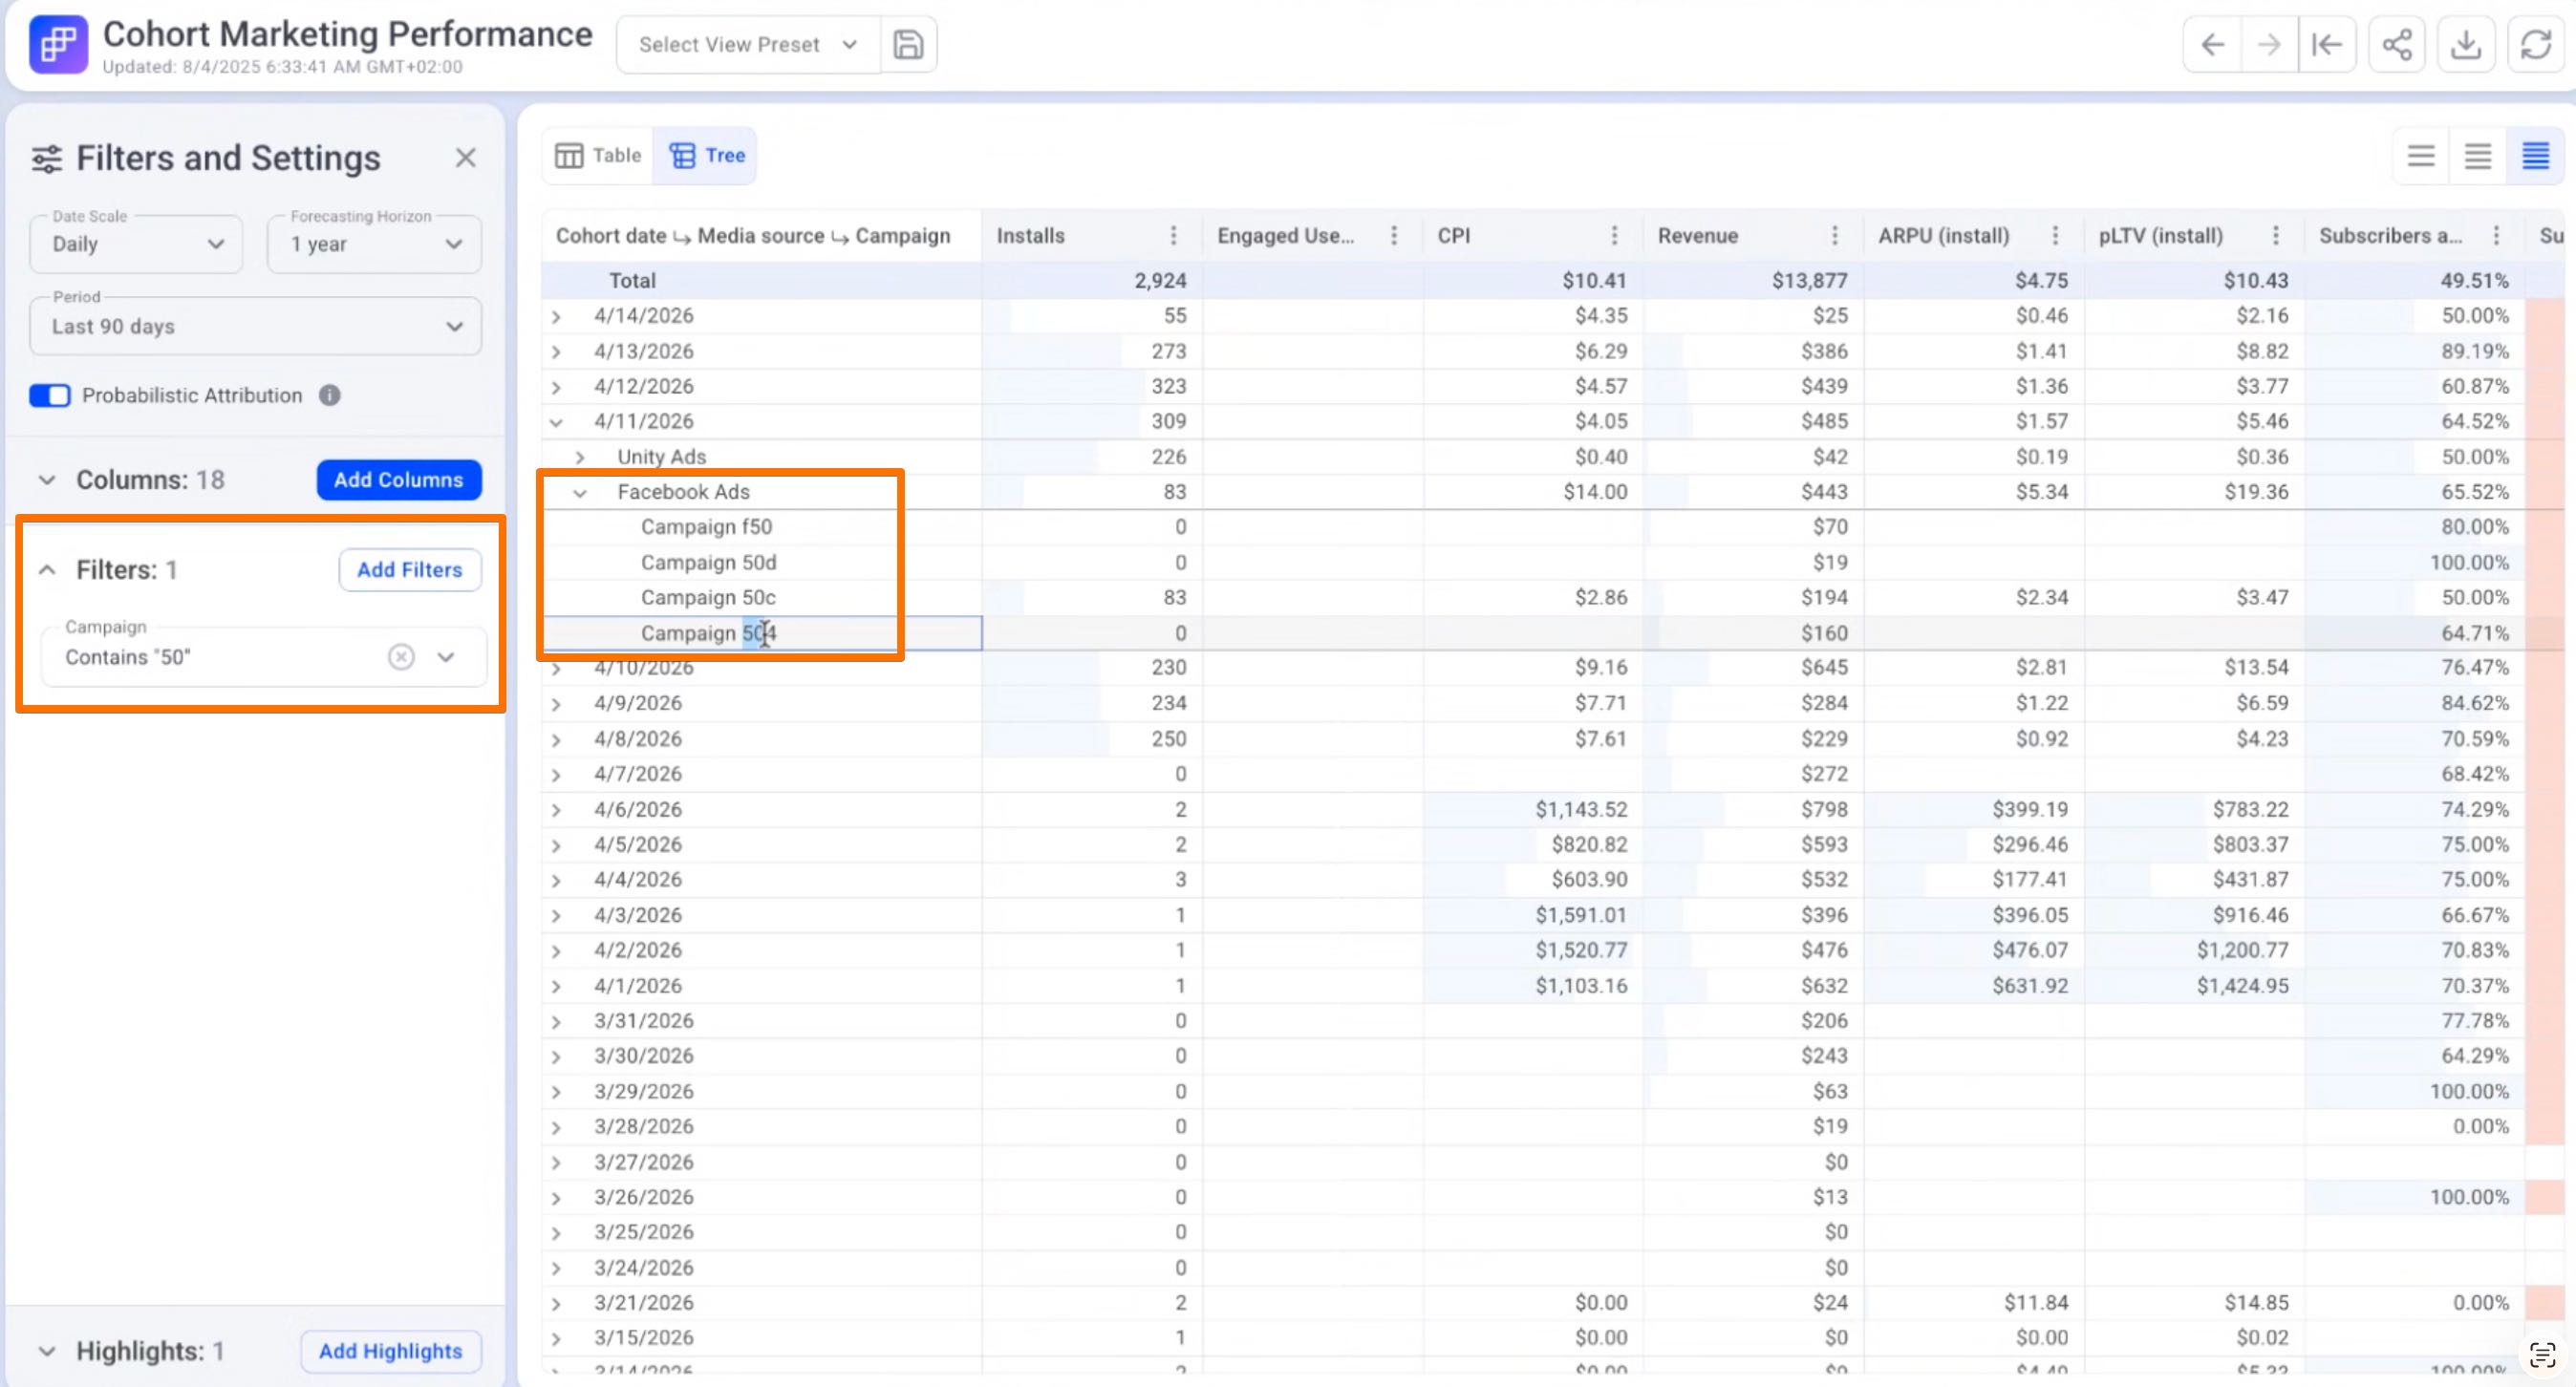
After applying, your statistics will be limited to those campaigns only. Open any media source (Facebook, TikTok, etc.) to see the filtered results.
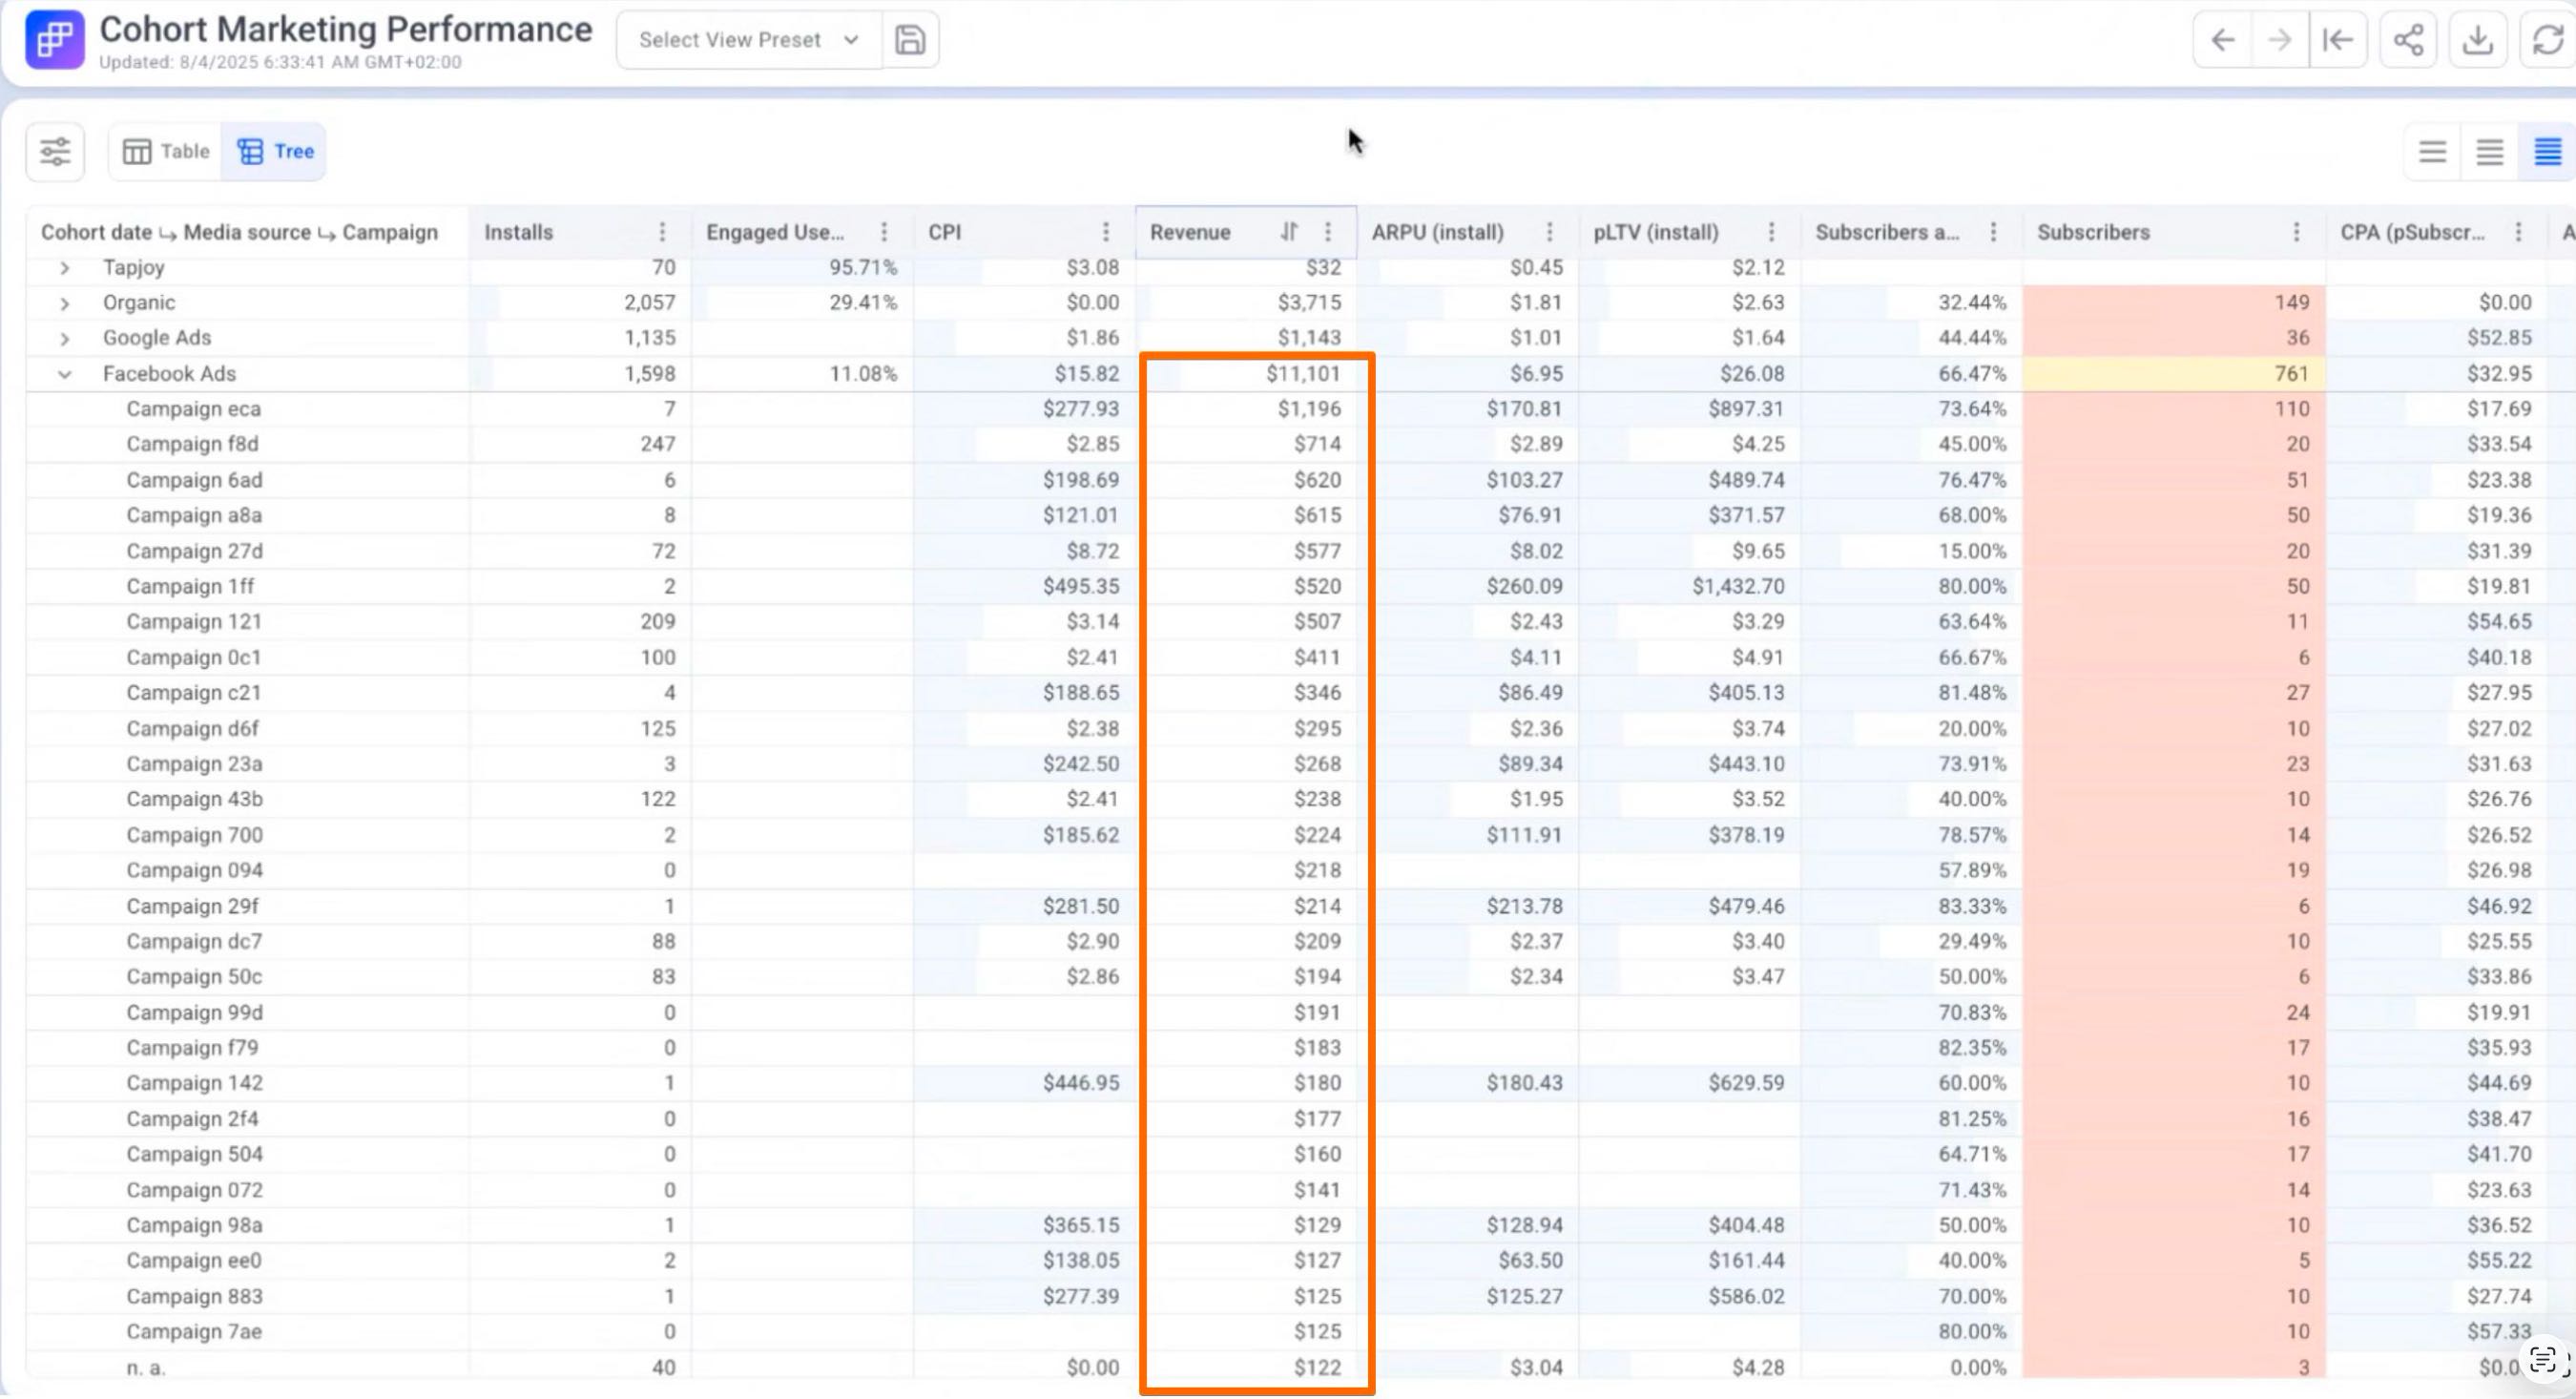
3. Advanced Sorting
Advanced sorting orders rows within nested dimensions, useful when you want to see, for example, top-revenue campaigns broken down by media source.
How to sort
Use case: show campaigns grouped by media source, sorted by Revenue in descending order for a specific cohort.
- Switch to Table view.
- Click the three dots menu on the column.
- Select Advanced Sorting.
- Choose the column to sort by (Revenue) and the direction (Descending).
- Click Send.

Open any cohort date and any media source (e.g. Facebook). Campaigns within that source will be ordered by Revenue, highest to lowest.
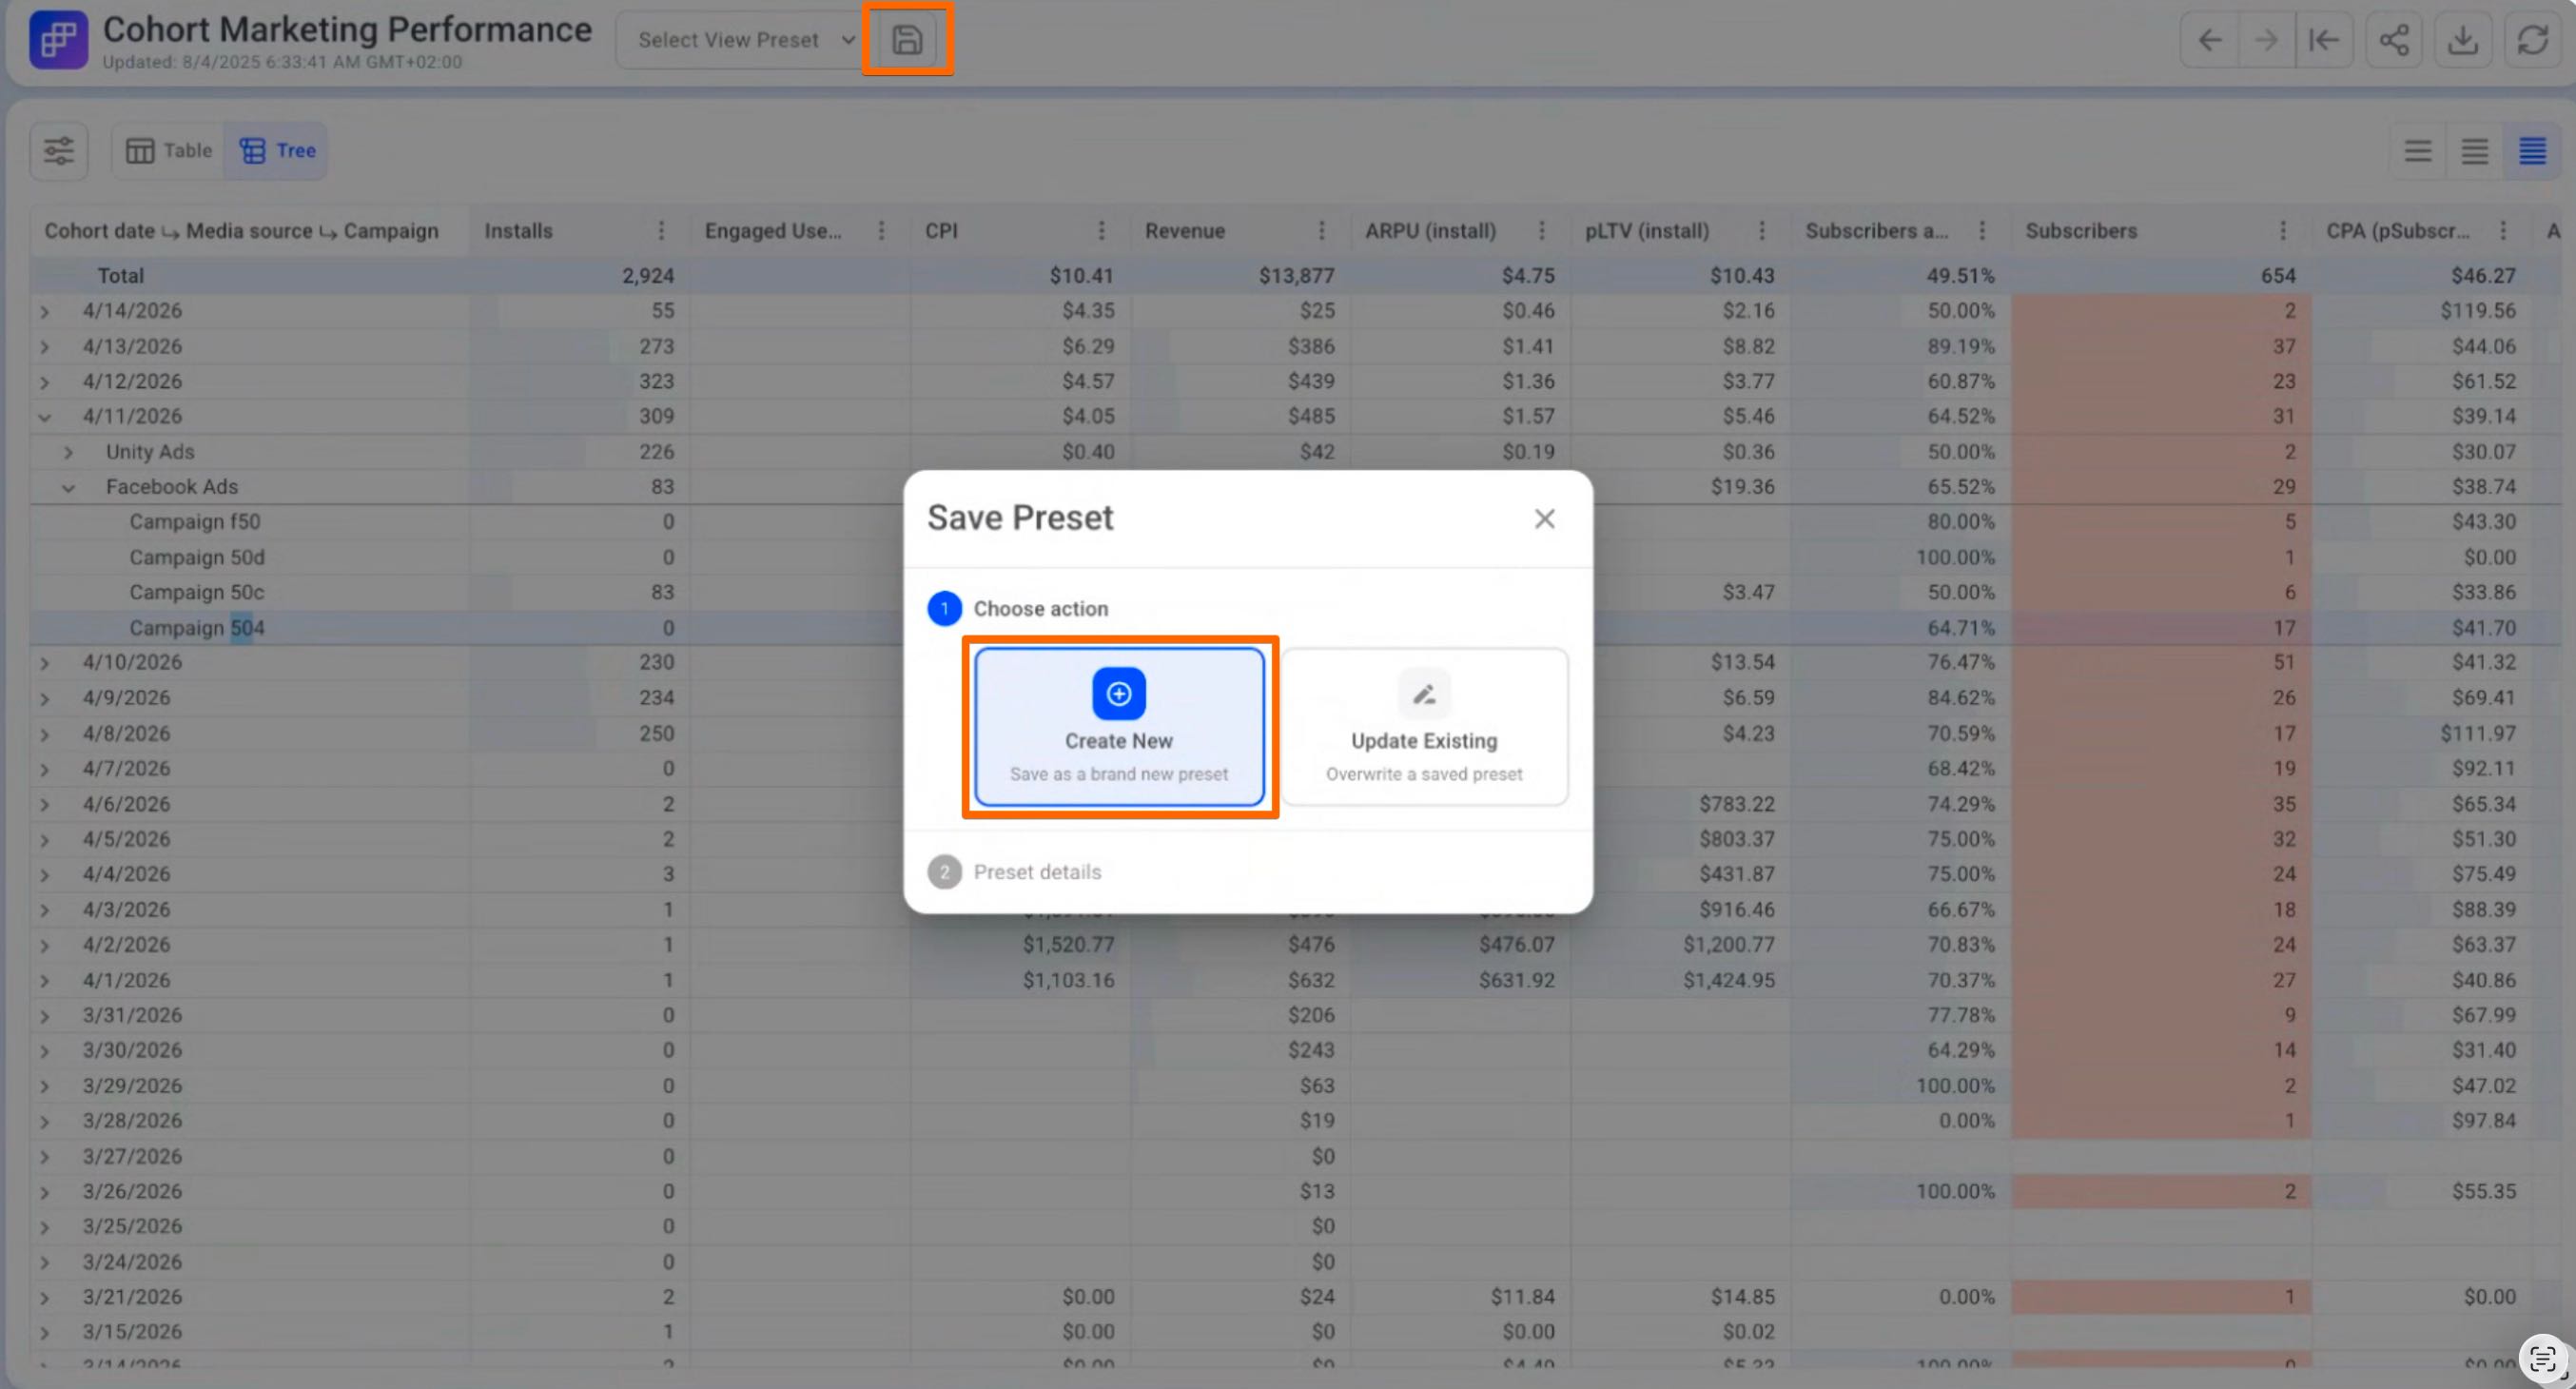
4. Saving Presets
If you've configured filters, sorting, and highlighting that you want to reuse, save the view as a preset. Presets keep your custom configuration one click away.
How to save a preset
- With your filters, sorting, and highlights applied, click Create new.
- Enter a name (for example,
Campaigns50). - Optionally, mark the preset as default or add it to favorites so it appears at the top of your list.
- Click Save.
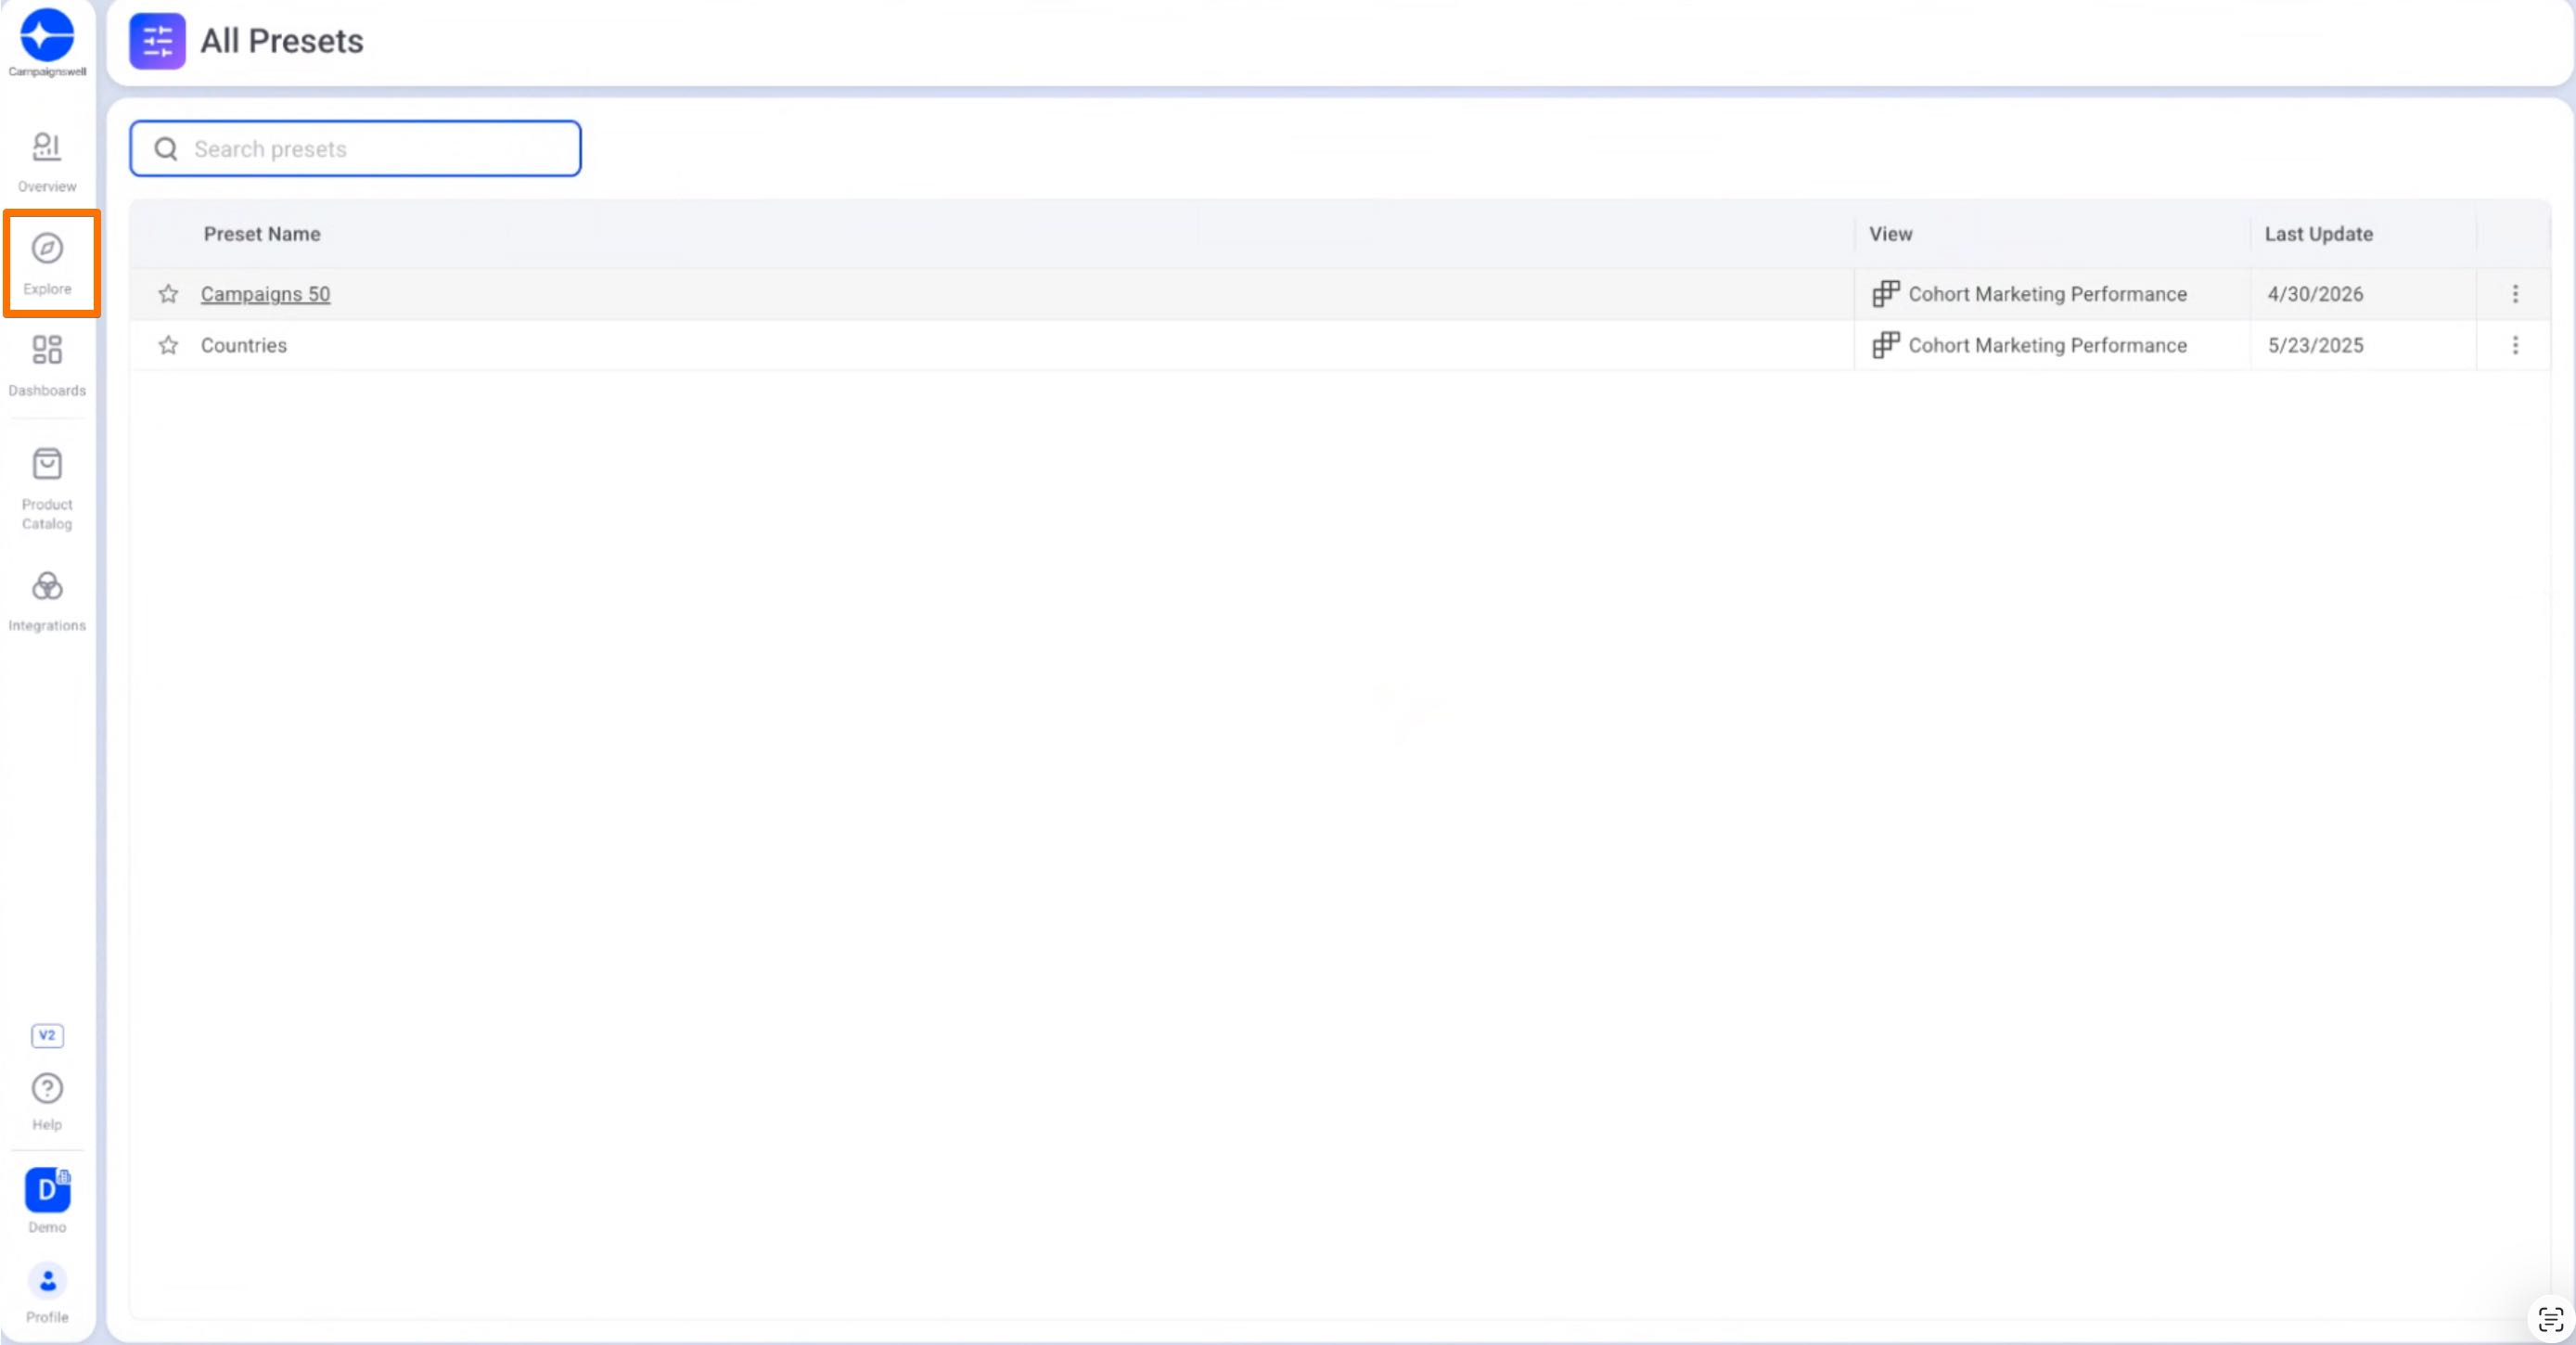
Where to find your presets
Saved presets appear under Explore → All Presets.
- Open Explore in the left navigation.
- Click All Presets.
- Your saved preset (e.g.
Campaigns50) is in the list, ready to apply with a single click.
Putting it all together
These four features work best in combination. A typical workflow:
- Filter the dataset down to the campaigns or sources you care about.
- Sort the results so the most important rows surface first.
- Highlight key columns to make outliers visible at a glance.
- Save the configuration as a preset so you can return to this view anytime without rebuilding it.
If you have questions or want help setting up a specific view, reach out to your CSM.